Tuesday 28 May 2013

T-shirt Scarf

This week's Pin is a 'fail' but then 'nailed it!'  Let me explain.....


This Week's Pin: T-Shirt Scarf
Original Source: Fashiondivadesign.com
Who's This For?:  Me
Difficulty: Nifty Scissor Work,  No Measuring, Quick Machine Sewing or Glue
Price: All scraps

I liked the above Pin, from http://www.fashiondivadesign.com/20-diy-ideas-for-scarf-which-is-going-to-be-trendy-this-spring-2013/ and gave it a go.

Using an old long sleeve t-shirt of my husband's here's how it turned out.
From this....
to this!
FAIL!  The overall look is scruffy, like I bundled a handful of rags.  The original t-shirt was a ribbed jersey so when cut into thin strips it frayed like crazy.  As I stretched each strip it didn't roll into a soft form, but frayed, crinkled and looked really messy.  I even tried plaiting some to give it some shape.  No, no I can't save this.

Try again.


I found some scrap cotton jersey so I sewed it up one side.


I cut strips off the bottom about 2cm thick.  I stretched each piece.


I doubled over the lengths and sewed each strand together at the seam.


After reading the Pin about making jersey flowers (http://www.intheoldroad.com/2011/12/fabric-flower-and-scarf.html), I cut out four, five petalled flower shapes from felt scrap and a circle of jersey.


I folded each flower piece in half, then half again and sewed together in this shape.  You could also glue.  The yellow circle I pinched in the centre, gave it a twist and stitched to hold it's shape.


I sewed the centre of the flower in place and sewed it to a few strands of scarf.  Again, all of these steps could be done by using glue.


The final step was to cut another strip of fabric and wrap it and tie it around the join in the scarf to hide the seams.  Finished.

Ah ha!  So much better, the strands of jersey have rolled into a soft form, the white flower brightens the whole look and it matches perfectly with my new jumper.  I'm ever so pleased and it cost me nothing, just a little of my time.

See you next week.

Soops


“Have no fear of perfection, you’ll never reach it” – Salvador Dali

Saturday 25 May 2013

This week I've been watching the weather forecast intently.  The autumn rain has come and it's snowed a few times recently in the mountains not too far from home.  Brrr.  Not the best weather for painting but today - the sun shines!  Quickly, let's get onto this week's pin:


This Week's Pin: Letter Canvas
Who's This For?:  My Family
Price: Canvas $8.99 from Lincraft, Wooden Hearts (2) $3.70 and Wooden Letters (4) $7.12 from Bunnings, Fiddly Bits Spray Paint $2.95 from Bunnings and craft glue, Total $22.76
Difficulty: Only patience needed - watching paint dry


With all the letters of the alphabet available, I was stuck.  What do I write?  Live? Eat? Smile?  Keep it simple, I recalled and gathered the perfect letters, H, O, M and E.  Not too in your face.  Not trying to say too much.  

Next thing, what do I feel about home?  Love!  Hearts it is then.  Luckily there were two different sizes so that I could put them together for asymmetry.  Things appear more harmonious when they're asymmetrical.  That's weird.  How is that possible?  Don't know, but it's true.  You always plant trees in odd numbers, never even.

Allan Becker, the 'garden guru' wrote, "Because nature embraces chaos, odd numbers look more natural. At first, odd numbers of an item appear unbalanced; they are more difficult to divide because the eye is unable to pair them. When the eye tries to group an odd number into pairs, there is always one left over; the eye continues moving everywhere looking for a mate. This creates a pleasurable dynamic situation. The resulting phenomenon is that odd-numbered groups are particularly pleasing to the eye." http://allanbecker-gardenguru.squarespace.com/journal/2010/2/2/planting-in-odd-numbers-the-secret-to-a-beautiful-garden.html

With this firmly in mind, I glued the letters for home across the bottom (yes I drew a pencil line for letter placement) and positioned the two hearts to be off centre and at different angles so that they don't appear like a 'pair'.  So I'm waiting for glue to dry.  Perhaps a cup of tea then.


Now, with a big painter's sheet underneath, start spray painting.  It's taking many coats to get an even effect, but that's ok because it's always better to build up light layers of paint than to be heavy handed and have the paint run or become too thick.  Many, many coats later, I'll bring it inside to dry in the heated house.

Day 2 of watching paint dry begins.  I'm noticing that the edges of the letters are not taking up the paint at all so I've got a creamy shadow effect to the wooden shapes.  When I'm finished with the spray painting I'll have to hand paint each edge.  Really should have done this first before attaching to the canvas.  However, the overall effect is looking great.


After 5 days of painting and waiting, it's finished.  But I thought it was missing one more thing.  I added a silver painted heart to the heart cluster.  Perfect.


When I showed the canvas to my family, they all loved it.  My husband asked "What colour will it be?"  "Um, this colour" I replied.  "I love it" he said.  Thank goodness for that because the purple that I originally wanted was on the very top shelf, three racks higher than I could reach.

'Till next week,

Soops.


“Every child is an artist, the problem is staying an artist when you grow up” – Pablo Picasso

Tuesday 14 May 2013

No Bake Energy Bites

Well, this is Week 5 of my challenge and I have to admit it, doing one Pin a week is a cinch.  I don't always have to buy many new things to complete each Pin and I always look forward to creating something new.

This week, we need something new to eat.  My Pin about the Marshmallow Icing has more than 20 repins so far so I'm pleased that others believed me when I said it was good.


This Week's Pin: No Bake Energy Bites
Original Source: saltlicker.com
Who's This For?:  My Daughter and I for Morning Tea
Difficulty: Measure and Mix - Done!

My daughter and I both love muesli bars.  We especially love the nutty ones and a little chocolate on them is also yummy.  I found this recipe for Energy Bites that don't require any baking.  Couldn't be simpler.

The original recipe needed ingredient replacement as I suffer from fructose malabsorbtion.  That means that I can't absorb fructose in my digestive system and that leads to pain, bloating, upset stomach and many other side effects (one of which is grumpiness from high levels of wheat - who knew?)  I must say that I'm not a dietitian or any specialist with regard to health foods but I have done my research recently to ensure that I feel well and happy.  


So the ingredients now are as follows:

1 cup oats
1/2 cup dark chocolate bits
1/2 cup almond spread
1/4 cup slivered almonds
1/4 cup sunflower kernels
1/3 cup golden syrup
1 teaspoon vanilla

Oats are easily digested and full of fibre so there's no change there.  The chocolate I've chosen is dark chocolate with 40% cocoa (could have gone higher, I know but I had dark choc bits on hand).  Remember, the higher the cocoa, the higher the antioxidants and the lower the sugar content.  Surely we don't need to be encouraged to eat chocolate but try to move away from the white chocolate and closer to the darker chocolate.

Almond spread is high in protein, magnesium and manganese, low in saturated fat and for those children with nut allergies, almonds are a tree nut which are allowed at some schools.  I've added slivered almonds for crunch and extra good fats, sunflower kernels for added copper, magnesium and manganese and lastly, I needed to replace the honey with golden syrup because honey has a very high fructose level (I'll be on the couch with belly pain within an hour or so, so no thank you).


Simply, all the ingredients are measured and placed in a bowl and mixed until blended.  I rolled the very sticky mixture into balls and left on a tray to dry out so that the outside was no longer sticky.


Taste testing time!  My daughter says "Super soft on the inside and it's so delicious plus it serves so much goodness for my body with lots of seeds and stuff." That was completely unscripted, I promise!

If anyone tries this recipe too, please let me know what ingredients you may have exchanged.  See you next week.

Soops

“Life expectancy would grow by leaps and bounds if green vegetables smelled as good as bacon.”  ~Doug Larson

Tuesday 7 May 2013

Travelling Terry Toothbrush Holder

This week, it's a Pin using recylced materials.  I'm converting a humble facewasher into a holder for my daughter's toothbrush and toothpaste to take on camp.

I'm repulsed when my hairbrush and my toothbrush meet inside my toiletry bag.  When I arrive at my holiday destination I usually unpack a few items and sometimes I discover that my eyeshadow has a crack in the case or my toothbrush has met my hairbrush during transit and yuck, there's a hair caught around the bristles.  I pinned this because I thought that it was very clever recycling.  The original is made from a hand towel, however I'm making a smaller version from a facewasher.


This Week's Pin: Travelling Terry Toothbrush Holder
Original Source: Etsy.com
Who's This For?:  My Daughter
Price:  Use an old facewasher or handtowel and scrap ribbon
Difficulty: Simple straight sewing on machine

This Pin seemed a clever idea and was available for purchase from Etsy.com (http://www.etsy.com/listing/86300220/terrycloth-toothbrush-and-paste-travel) however, I felt it was too large for my daughter to take on camp so I purchased a small, child's toothbrush and a travel toothpaste and found a large facewasher in her favourite colour at home.


The process was easy and it took only a few minutes to sit at the sewing machine and sew a few rows of stitching up the facewasher.  Before you sew, make sure the toothbrush will fit in the pocket you create.


It rolls up and fits easily in the toiletry bag and hopefully any spills and stickiness will be soaked up by the facewasher and stay off everything else including the hairbrush.


My daughter returned from camp and announced that the toothbrush holder was a success as it was all kept clean even when it ended up at the bottom of her camping bag.

I'm not sure what's in store for next week.  I might make a bathroom cleaner to try and help my tedious housework or perhaps cook something new.  Let's wait and see next week.

Soops


“Creativity is contagious, pass it on” – Albert Einstein


Thursday 2 May 2013

The Baby Quilt


This week's Pin: Scrap Quilt
Who's this for?:  My Neice's First Child
Cost of materials: Scraps and Wadding (leftovers), White Broadcloth ($4.00),
Green Cotton Poplin for backing ($11.99)
Difficulty: Average -  Straight machine sewing, lightning speed for an experienced quilter, or a couple of days for a quilting beginner.

My niece is due to have a baby next month.  Everyone is so excited as this will be the first baby born into the next generation of our family.  An invitation to the Baby Shower arrived recently so this is now an urgent project.  This is a small quilt for the baby to lie on when it's on the floor, or can be used in the pram or the cot.


I'm not a regular quilter but I have made a few items and I understand the concept.  This type of quilt is for using up scraps leftover from previous projects.  The only purchase was the white and the backing fabric.  There are no instructions for this quilt so I'm using the image above from flossyblossy for inspiration to create my own design.  I see that each scrap is a different width - good, I don't have to measure everything.


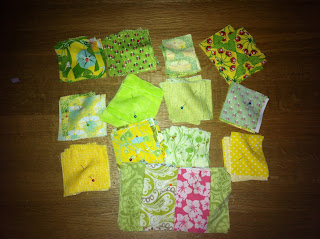
My lovely neighbour Angela is a quilter and gave me her scrap bag to use.  Wow, this bag weighs more than a small child!  My neice loves green and we do not know the sex of the baby so I've chosen predominantly green and yellow scraps.  There are a lot of Pinterest Pins about how to best announce the sex of a forthcoming baby.  This is not a common practise in Australia but perhaps it's increasing in trend.  I rarely hear what sex the baby is until after it's born.  Then, everyone bolts for the closest baby shop to buy up the right colour clothes!

Angela's scraps are already in strips.  After only 15 minutes of snipping, I've cut the scraps into pieces ready to sew.  What I like about this project is that measuring is not necessary at this stage, only when I assemble the "stripes" so it's well underway after very little time.  Under an hour spent at the machine and now the strips of scraps are ready for the next step.


Sew each stripe with the white panels in between.  Measure the wadding and sew to the back of the quilt.  Now, measure the fabric for the backing and sew.  I've chosen a patterned fabric for the back with a lot of colour as this is the side that will be down on the floor and needs to be forgiving as it will get dirty.  The patterned top side is also going to be hiding marks well as this is the side baby will lie on, dribble on, spit milk on and perhaps even leak poo on.


I love it. I'm really pleased with the result.  The original quilt has each row a different colour so I replicated this, keeping each row either predominantly yellow or green.  I hope she loves it (remember, don't tell my niece,  it's a secret until Sunday).

Next week I'm making a travelling toothbrush holder.

Soops

Our lives are like quilts - bits and pieces, joy and sorrow, stitched with love...  Author Unknown
Quilting is cutting big pieces of fabric into little pieces and sewing them back together into a big piece...  Author Unknown